Depth of field is one of those concepts that sounds technical until you see it in action — and once you do, it becomes one of the most deliberate creative tools you reach for in every shot.
The idea is straightforward: in any given photograph, there's a zone of sharpness. Everything within that zone is in focus. Everything outside it gradually blurs. The size of that zone — how wide or narrow it is — is depth of field.
The Three Factors That Control It
Aperture is the most direct and accessible control. A wide aperture, like f/2.8, creates a shallow depth of field where only a thin slice of the scene is in focus while the foreground and background blur softly. A narrow aperture, like f/16, keeps much more of the scene in focus from front to back. This is why portrait photographers often shoot wide open — f/1.8 or f/2.8 — to isolate the subject against a creamy, blurred background, while landscape photographers typically close down to f/11 or f/16 to keep both the foreground rocks and the distant mountains sharp.
Focal length is the second factor. Longer focal lengths — 85mm, 135mm, 200mm — produce a shallower depth of field at the same aperture setting than shorter focal lengths do. This is one reason the 85mm lens has become a portrait standard: it combines flattering compression with the ability to isolate a subject even at moderate apertures.
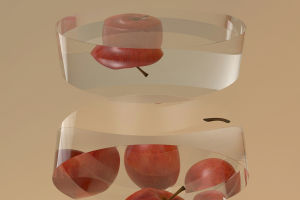
Subject distance is the third variable. The closer your camera is to the subject, the shallower the depth of field becomes. Macro photography demonstrates this at an extreme: at very close focusing distances, the depth of field can shrink to just a few millimeters, so even a slight focus shift throws details in and out of sharpness.
The Focal Point and Where You Place It
Choosing where to place your focal point is just as important as controlling how large the depth of field zone is. In a portrait, the conventional choice is the eyes — specifically the eye closest to the camera. If the eyes are sharp and expressive, the viewer reads the portrait as focused and engaging, even if the hair and ears fall slightly soft. In product photography, the focal point is wherever the key detail lives — a logo, a texture, a specific design element. For landscapes using a deep depth of field, a common approach is to focus roughly one-third to halfway into the scene, which maximizes the zone of sharpness across both the near foreground and distant background.
Creative Applications Beyond the Basics
Selective focus — using a very shallow depth of field to isolate one specific element — creates an immediate sense of intimacy. The subject pops. Everything else recedes. This technique is particularly powerful for portraits and product close-ups. Going the opposite direction and maintaining a deep depth of field leads the viewer's eye into the scene rather than isolating a single point. This approach suits storytelling images where the environment matters as much as the subject.
Focus stacking is worth mentioning for situations where neither a shallow nor a deep depth of field gives you what you need. By capturing multiple images at different focus points and combining them in post-processing, it's possible to achieve sharpness across an unusually wide range of depths — particularly useful for macro photography or detailed still life work.
Shooting in Low Light
Maintaining a shallow depth of field in low-light conditions pushes toward wider apertures, which can conflict with the need for a proper exposure. Using a tripod allows for slower shutter speeds without introducing camera shake. Raising ISO compensates for reduced light when using a narrower aperture is necessary. These trade-offs are part of the practical challenge of working with depth of field in real shooting conditions.
Mastering depth of field is ultimately about directing attention — deciding exactly what the viewer sees clearly and what fades into atmosphere.